Picture the stars twinkling overhead, the crackle of the campfire, and the chorus of nocturnal creatures lulling you to sleep. But wait. Before we drift into this idyllic scene, there's a crucial hurdle we must overcome: setting up the tent!
Camping tents are an indispensable aspect of any camping journey and can spell the difference between a delightful retreat and a nightmarish expedition. So, to improve your camping experience, we'll navigate the thrilling terrain of tent setup, guiding you through a series of simple yet critical steps.
Ready? Let's get to it.
First Things First
Before embarking on your trip, it is essential to always practice setting up your tent. While the setup may seem straightforward, it can become challenging when dusk falls and confusion sets in. By familiarising yourself with the process beforehand, you can avoid the frustration of struggling to assemble your tent and ensure a comfortable night's sleep. Additionally, practising allows you to identify any broken or missing parts that may need attention.
Similarly, it’s important to gather all the necessary equipment for your camping adventure. Let’s divide this into two categories: miscellaneous gear and extra parts. Miscellaneous gear comprises items like flashlights, a mallet for hammering tent stakes, sleeping bags, chairs, a water jug, and a first aid kit.
On the other hand, extra parts are essential in case any components of your tent go missing or break during the trip. These include tent poles, stakes, guy lines, and a tent repair kit. We advise that you consult with your tent's instruction guide to ensure you have the required extra parts already included with your tent.
7 Steps to Set Up a Tent
Adventure beckons! Now, let's dive right into the heart of our guide and unfurl the map to setting up your camping haven. If you're a visual learner, the video below encapsulates everything you need to know. Otherwise, follow the 7 easy steps below to pitch your tent:
Step 1: Find an appropriate spot to pitch the tent
Before you start laying your tent, you must first select the best spot to ensure your comfort and safety. When choosing a spot to pitch your tent, consider factors like:
1. Ground level
Look for a flat, dry spot. Avoid sloppy or uneven terrain, as it can cause discomfort when sleeping, and the tent may slide or collapse. On the other hand, a flat surface ensures your tent's stability and comfort, along with maximising the interior space.
2. Check for shelter
Scout for natural shelters such as trees or boulders that could offer additional protection from harsh weather. But ensure that your chosen shelter is safe; a dying tree, for instance, could potentially topple over during a storm.
3. Avoid low-lying areas
Avoid low-lying areas as they can be prone to flooding or water accumulation. Similarly, cool air tends to settle in low-lying areas, which can cause chilling compared to higher ground. Low-laying areas may also attract more insects and wildlife, particularly near water sources. Plus, they often have limited air circulation, which can lead to poor ventilation, potentially leading to odours or stuffiness.
Step 2: Lay out the tent
After finding an ideal spot, your next aim should be to lay the base. Lay the tent on a flat, dry surface and ensure there are no sharp objects or animal droppings on the ground. Clear the base and lay it by removing any sticks, stones, or debris. But before you begin assembling, place a tarp on the ground. The footprint or tarp often comes with the tent, which helps to insulate it from moisture seeping through the ground.
Step 3: Assemble the tent poles
The poles may be numbered or connected with a bungee rope, depending on your tent type. Assemble the poles and insert them into the corresponding tent clips. Make sure all the poles are securely attached to the clips. The most basic tents will have two poles that cross each other to form an X shape. While in some other tents, especially family-sized tents, there may be more than two poles.
Step 4: Attach the tent fly
Next, elevate the tent by slowly raising the main tent poles. In some tents, you may need some coaxing by pulling the corners apart so they are square. Now that your tent is upright, if it uses a tent fly, unfold it, find the attachment point, and secure it to the poles. Ensure the tent fly is oriented correctly, with the front, back, and sides matching the corresponding sides. Also, make sure the fly is taut to provide adequate weather protection. This secondary layer on your tent offers extra insulation and protection from wind, rain, and UV rays.
Step 5: Secure the tent stakes
After positioning the tent squarely on the tarp, secure it by driving stakes into the ground. Select strong stakes appropriate for the terrain, such as heavy-duty metal stakes that can pass through the flaps near the tent's corners. In rocky or hard grounds, use a hammer to drive the stakes in. This will ensure the tent remains stable and secure even during windy conditions.
Step 6: Set up the rainfly
If your tent comes with a rainfly or rain guard, attach the rainfly to the tent poles and secure the guy lines to the stakes. Most tents have rainfly straps you can cinch at the tent pole. Securing each of these around the nearby pole will help to stabilise and strengthen the tent.
When setting up, ensure the first fly corner tension is not too taut. Instead, wait until the fly is fully on and then evenly tune all the corners. Check to see if the seams on the fly line are up with the seams and the pole on the tent body. If it's not, then readjust the rainfly tension so they align.
The rain guard, also known as a rainfly or rain cover, is a separate waterproof cover that is placed over the tent to shield it from rain. It acts as an additional layer of protection and helps prevent water from seeping through the tent fabric. On the other hand, the tent fly is an integrated part of the tent and serves as its outer layer. It is typically made of waterproof material and is designed to keep the interior of the tent dry by repelling rainwater.
Step 7: Set up the tent vestibule
Finally, if your tent has a built-in vestibule or comes with a vestibule attachment, set it up. The vestibule provides additional protection or covering for organising your stuff. Attach the tent vestibule to the tent poles and secure the guy lines to the stakes. Pack an extra guy line cord if you need to rig a longer line or add an extra guy line.
Other Tent Setup Guides

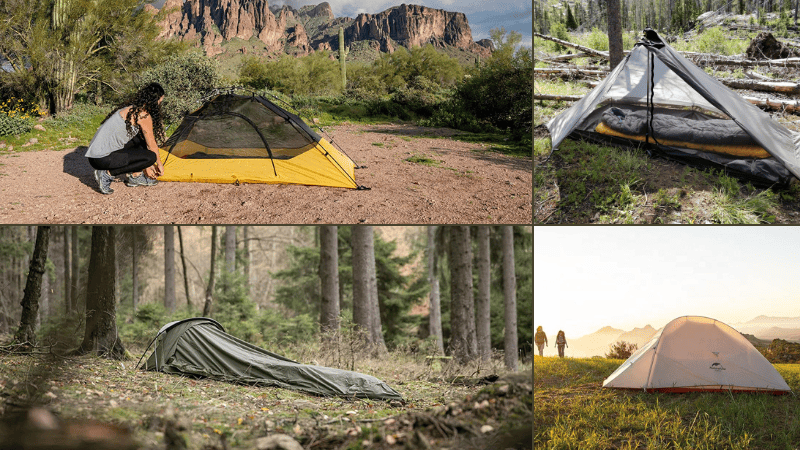
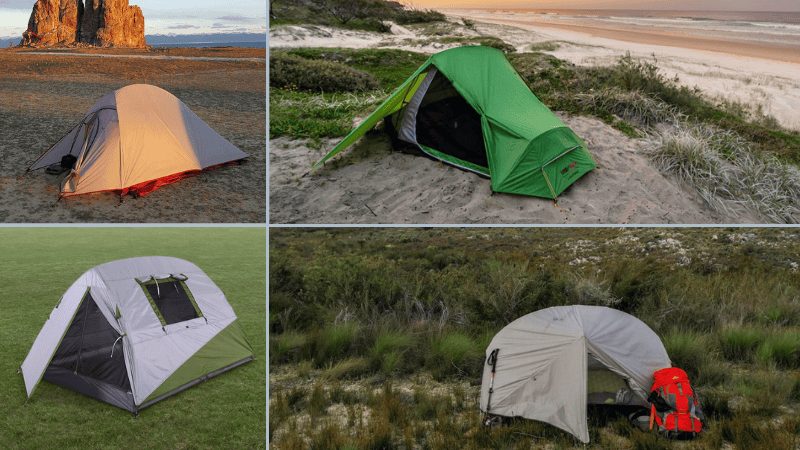
In addition to the traditional dome tent setup covered in this guide, there are several other intriguing tent types that offer distinct setup methods. Here are a few examples:
- Teepee tent: Begin by staking out the tent before raising it. Insert the center tent pole, tighten the corners, and then add the inner tent and groundsheet to complete the setup.
- Backpacking tent: Despite their different appearance, backpacking tents follow a setup process similar to classic dome tents. The procedure remains largely the same.
- Rooftop tent: Find a suitable location on your vehicle's roof rack, then securely attach the tent using the provided mounting system. Once in place, unfold the tent, extend the ladder, and secure any additional support poles. Read our dedicated guide for an in-depth approach.
- A-Frame tent: Similar to teepee tents, you stake out an A-frame tent before raising it. However, instead of a single center pole, there are two poles (one on each end). Attach the guylines and rain fly to finish the setup.
- Freestanding tent: Start by connecting the poles and assembling the tent frame. Next, attach the inner tent to the frame and, finally, secure the tent fly. No staking or guylines are necessary for freestanding tents, making them suitable for platforms and challenging terrains.
- Pop-Up tent: This hassle-free option requires no setup at all. Simply toss it into an open space, and it instantly pops into shape. While pop-up tents offer convenience, they also come with a few disadvantages when compared to regular tents.
Tips for Setting Up a Tent
As an experienced bushman, here are a few tips for making your tent setup not just smooth but enjoyable.
Tip #1 - Practice regularly
We mentioned this but again, practice setting up your tent at home before heading out to the campsite. This will allow you to familiarise yourself with the tent and identify potential issues. Setting up the tent at home will also help you become more efficient. It also allows you to identify challenges or problems while setting up in the wild. Furthermore, practicing setting up a tent at home will enable you to adapt to different situations and conditions.
Tip #2 - Have the right tools
Having the right tools for setting up a tent can make the process easier, more efficient and helps you overcome challenges. As such, your camp bag includes tools like a hammer, tent stakes, and a handy mallet to make the setup process easier. A pocket knife or a multi-tool is the Swiss Army knife of camping gear. A seam sealer might also come in handy if you're expecting a bit of a downpour.
Tip #3 - Always have backup plan
The Australian outback can be a bit of a showoff when it comes to unpredictability. So, a well-thought-out backup plan can be a lifesaver. Scout your surroundings for an alternative shelter, and stash extra tent stakes and guy lines in your gear. Remember, safety comes first, always!
Tip #4 - Work with your environment
Another valuable tip to consider when setting up a tent is to use natural features in your camping area. For example, use large trees and rocks to secure the tent and provide additional protection from the elements. Also, watch out for natural depressions like shallow valleys and gentle dips to help divert rainwater from your tent.
Other Recommended Tent Accessories for Camping
The magic of camping lies not just in the call of the wild but also in your cosy, portable home – your tent. It's the cherry atop your camping sundae, and decking it out with some extra creature comforts can transform your camping expedition into a truly memorable experience.
Consider adding a bit of luxury with a sleeping pad or snug sleeping bag. Imagine reclining in a comfy camping chair with a cold beverage fresh from your camp cooler after a satisfying day of exploring. And when the sun dips below the horizon, a headlamp or lantern becomes an indispensable beacon in the wilderness.
Frequently Asked Questions (FAQs)
Here are some frequently asked questions on how to set up a tent.
What is the most critical step when you set up a tent?
The most crucial step when setting up a tent is selecting the right spot. It needs to be flat, dry, and free from potential hazards like dead trees or flooding-prone areas. The spot you choose can significantly influence your comfort and safety during the camping trip.
Can I set up a tent alone, or do I need help?
Yes, you can certainly set up a tent on your own. The process might be a bit more challenging and time-consuming compared to setting up with another person, but with practice and familiarity with your tent, it becomes an achievable task.
How long does it typically take to set up a tent?
The time it takes to set up a tent varies depending on the tent's size and design. However, with practice, an average tent can usually be set up in about 10 minutes. Larger or more complex tents might take a bit longer.
Do I need any special tools to set up a tent?
Most tents come with everything you need for set up, but a few additional tools might come in handy. A mallet for driving in stakes, a pocket knife or multi-tool for miscellaneous tasks, and a seam sealer to enhance waterproofing are all useful additions to your camping kit.

The Last Stake
While erecting a tent can seem a bit daunting, a bit of preparation and know-how can turn it into an exciting part of your camping journey. Heed the steps and tips outlined in this guide, and you're well on your way to a fantastic outdoor experience.
Remember, setting up a tent is more than creating a safe shelter. It's about crafting a cosy nest amidst nature, a place that feels like home. So gear up, follow these steps and tips, and embrace the thrilling adventure that awaits in the great Australian outdoors. Happy camping!


